Showing posts with label BAKING AND DESSERTS. Show all posts

Tuesday, September 7, 2010

Vegetarian Butter Cake


I was in the mood for baking and this time around I wanted to bake without using eggs. Ever since Mages introduced me to the eggless butter marble cake that she orders from a home bakery in Brickfields, I was hooked to vegetarian cakes. It was difficult to find a good recipe on vegetarian butter cake and when I finally found one, I decided to give it a try. 

Herewith is the recipe:
Ingredients:
1 1/4 cups of all purpose flour
1 1/2 tsp baking powder
1 1/3 cups of unsalted butter
1/2 to 3/4 cup of sugar (depending on how sweet you want the cake to be)
1 1/4 cups of evaporated milk
1 1/2 tsp of vanilla essence

Steps:
1. Preheat oven to 190 degrees Celcius.
2. Grease and line a round cake pan. 
3. Sift together flour and baking powder. 
4. In a medium-sized bowl, beat butter and sugar until the mixture doubles and turns pale yellow. (It's important at this stage not to overbeat the butter - otherwise the butter will separate. When the butter separates due to overbeating, you can store the mixture in the fridge for a while before creaming it again).
5. After creaming the butter and sugar until it turns pale yellow, mix evaporated milk and vanilla slowly into the creamed mixture. 
6. Mix in flour one spoonful at a time until well blended. 
7. Pour the mixture into the prepared cake pan. 
8. Bake at 190 degrees Celcius for 40 minutes to an hour, or until a tester is inserted into the center of the cake comes out clean.

Monday, August 16, 2010

Marbled Cheesecake

Ever since I got pregnant, I had pretty much been lazy in baking. But, I do miss the euphoria I get when I bake - the satisfaction in my heart when I see my loved ones devour the cakes I bake and the joy of sharing the cake with my family members and friends. When I moved to KL after marriage, it was just the two of us - and baking became less exciting because I couldn't share it with my sisters and cousins who have always been the ever-ready 'testers' of my baking outputs. 

This time around, my sister made a special request for a chocolate cheesecake. Cheesecake had always been a popular request from my family members. I have baked chocolate cheesecake before, so I decided that I should try baking marbled cheesecake. It turned out very creamy and nice and it's so easy to make because this cheesecake does not need to be baked in a water bath as my previous cheesecake recipes required.

Marbled cheesecake

Recipes as follows:

Ingredients:
For the crust:
2 cups of graham cracker crumbs
1/4 cup sugar
1/2 cup melted butter
For the filling:
2 blocks of 250 gm Philadelphia cream cheese
1 cup of sweetened condensed milk
3 eggs, room temperature
120 gm bittersweet chocolate

Steps:
1. Preheat oven to 175 degrees Celcius.
2. To prepare the cheesecake crust, combine graham cracker crumbs, sugar and melted butter until the crumbs clump together.
3. Spread the mixture evenly into the bottom of the cake pan and press down firmly to make an even base. Bake for 10 minutes in the preheated oven. Set aside.
4. Reduce oven temperature to 150 degrees Celcius. 
5. Melt chocolate over a double boiler. Set aside to cool slightly. 
6. In a large bowl, beat cream cheese until smooth. 
7. Add condensed milk and beat until smooth. 
8. Add eggs, one by one, beating each until fully incorporated. 
9. Pour 1/2 of the batter into the bowl with the melted chocolate and stir well. 
10. Pour chocolate and plain cheese batters into the prepared pan, evenly distributing and alternating batters. Swirl with a clean knife. 
11. Bake cheesecake for 50-55 minutes. The top of the cheesecake should be set, but the underneath should still have a wobble/jiggle to it. 
12. Cool the cheesecake in a fairly warm place after removing it from the oven to allow it to set without cracking. 
13. Chill the cheesecake overnight before serving. 

Wednesday, December 30, 2009

Baking Spree

Today is a baking-spree-day for me. I baked chocolate cake with frosting, blueberry cheesecake, and orange almond flourless cake - all-in-a-day's work. Despite the tiredness, it puts off huge amount of stress of having to do it all on the day of the party - it's just impossible. Tomorrow will be all the cooking and pizza-dough-preparation day.

Thursday, December 24, 2009

Kesari


Yesterday was Alfred's grandmother's 16th day death prayers. I made kesari and chocolate-fudged marie biscuit to bring for the prayers. Kesari is a type of Indian sweet made from semolina flour and it is popularly made for parties or prayers. It is relatively easier to make as compared to the other Indian sweets like mysorepaaku or ladoo. An interesting fact - Kesari literally means "lion" in Sanskrit and it commonly refers to the saffron color used as a natural food color. Since saffron is relatively more difficult to obtain and it is more expensive, artificial colorings are used.

Herewith is the recipe:

Ingredients:
1 cup of sugi flour (semolina / rava flour) -roasted
Cashew nuts (broken)
Raisins
Cardamom pods (3-4)
2 cups of milk
1 cup of water
5 tbsp ghee (clarified butter)
3/4 cup of sugar
Orange food coloring

Steps:
1. Heat a wok and dry roast the sugi flour till pale yellow and aromatic. Transfer it to a dry plate once done.
2. Then heat 1 tbsp of ghee and fry the broken cashews, raisins (fry until the raisins turn plump and juicy) and the crushed cardamom pods. Set aside.
3. Add 2 cups of milk and 1 cup of water in the same pan and let it come to a boil.
4. Then add the food color and mix well.
5. As the water starts bubbling, reduce the flame.
6. Now add the sugi flour in a wide spread manner . Do not put as lump in one place . Add it slowly without stirring and cover it tightly with a lid.
7. Allow the sugi to be cooked at very low heat .
8. Do not stir the kesari now, as it may create lumps.
9. Check often to see if all the water has been absorbed.
10. When it is fully cooked and there is no water, add the sugar and stir well.
11. When the sugar is fully dissolved, add the remaining ghee and stir until the kesari starts leaving the sides of the wok. Garnish with the fried cashews and raisins.

I've always loved rich and moist kesari and the trick to this lies in adding the milk and generous amounts of ghee. Love it!

Tuesday, December 22, 2009

Almond Orange Flourless Cake


Almond and orange - my all-time favorite - and the combination of both in a cake is simply delectable. This recipe doesn't call for any flour - the ground almond act as the binding ingredient for this cake. This is a rich and moist cake - absolutely scrumptious to the last bit! The syrup poured on the cake gives it a super-moist texture. It's perfect for a tea party.

Herewith is the recipe (Note: This is the less-sweet version):

Ingredients for the cake:
6 eggs (the white and the yolk separated)
1/2 cup sugar
Zest of 3 oranges
1 1/2 cups of ground almond

Steps:
1. Heat the oven to 180 degrees Celcius.
2. Separate the eggs into two bowls.
3. Beat the yolks with the sugar and orange zests until the mixture turns into pale yellow.
4. Then, stir in the ground almonds. Set aside.
5. In a separate bowl, beat the egg whites to peaks.
Tips to beating egg whites to peaks: 
a) The bowl in which you whip the egg whites should be immaculately clean and completely grease-free. Even the tiniest bit of grease or egg yolk will cause them to break down into a pathetic soup. 
b) You will get more volume when beating egg whites if you first bring them to room temperature. 
c) It's best to begin with a slow speed and gradually move up to high when beating egg whites.
d) When your egg whites get fluffy, STOP! If you overbeat them, they will liquify again. 
e) Use beaten egg whites straight away. Don't let them sit. 

6. After beating the egg whites to peaks, stir a spoonful of it into the yolk-almond mixture. Then, fold in the rest of it gently to the mixture.
7. Pour the batter into the pan and bake for 45 minutes.
8. Let the cake cool slightly.

Ingredients for the orange syrup:
Juice of 3 oranges
1/4 cup sugar

Steps:
9. Heat the orange juice and sugar together in a saucepan and boil for 5 minutes until it slightly thickens.
10. Spoon evenly over the cake, letting the syrup soak in as you go. The cake will absorb all of the syrup.
11. Bon Appetit!

Monday, November 30, 2009

Cousin's Bday ~ 24th Nov 09

Last Tuesday was my cousin, Sharveen's 16th birthday. I baked a chocolate cake for him - and this time I got to try the cake :) It was fun hanging out with family, catching up and reminiscing of the good old days. My maternal uncle entertained us that night with his quick wits.


My sister devouring a big slice of the chocolate cake ;)

Thursday, November 12, 2009

Rich Creamy Chocolate Cake


It has been so long since I last baked - I almost forgot when. I missed baking so much - felt as though a big part of me missing when I don't bake. The reason I have no mood nowadays to bake is because there's just two of us - and it's boring to indulge/devour the cakes all by ourselves. The more the merrier - so, this time around, I was excited to bake a cake for a Deepavali lunch gathering among Alfred's colleague tomorrow. Finally, I used our beloved Kenwood mixer for the first time ever since we bought it - and I love the mixer!

I decided to take the short-cut to baking this time - since I couldn't find cake flour in Tesco, I bought the instant chocolate cake mix instead - and decided to add frosting to the cake. So, herewith is the recipe:

Ingredients for the cake:
Pillsbury moist supreme chocolate cake mix (517 gm)
300 ml water
80 ml oil
3 eggs

Steps:
1. Heat oven to 175 degrees Celcius.
2. Grease 2 pans with butter and dust with cocoa powder.
2. Mix cake mix, water, oil and eggs in a large bowl at low speed until moistened. Beat the mixture 2 minutes at high speed until everything is well combined.
3. Divide the batter into half and pour it into the 2 greased cake pans.
4. Bake for 30-35 minutes. Cake is done when toothpick inserted in center comes out clean.
5. Cool in pan on cooling rack for about 1 hour.
6. Remove the cake from the pan and place it on a flat pan for frosting.
7. Frost when the cakes are completely cool.

Ingredients for the frosting:
1/2 cup butter
2/3 cup cocoa powder
3 tbsp castor sugar
1/3 cup milk
1 tsp vanilla essence

Steps:
1. Melt the butter over a double boiler.
2. Whisk in the cocoa powder until smooth.
3. Add castor sugar.
4. Add milk and whisk to spreading consistency. Add small amount of additional milk, if needed.
5. Take off the heat.
6. Stir in vanilla essence.
7. Spread the frosting over the 1st layer of cake and cover with another layer. Cover the top and sides of the cake with frosting.
8. Best to refrigerate overnight.


Thursday, November 5, 2009

Onde Onde


It has been a very long time since I baked or made any desserts. Today I was craving for onde onde (pronounced as 'on-day on-day'). The thought of gula melaka (palm sugar) oozing out from the poached dough got me running to Tesco to grab the necessary ingredients to make this dessert. Onde Onde is basically a bite-sized pocket of gula melaka encased in a glutinous rice flour dough, coated with shredded coconut. This dish is a real joy to consume, where the explosion of sugar with the first bite is addictive in itself - YUM! This is a traditional snack for Malays.

The key points of good onde onde are the nice fragrant pandan leaves and the luscious gula melaka (palm sugar). Herewith is the recipe:

Ingredients:
250 g glutinous rice flour (tepung pulut)
220 ml pandan juice (To make the pandan juice: Blend 5-6 long pandan leaves with 200 ml water and strain using a sieve to obtain a smooth juice.)
150 g  gula melaka (palm sugar), finely chopped (so that it will melt evenly when the dough is poached)
150 g grated coconut
A pinch of salt

Steps:
For the dough:
1. In a large bowl, combine the glutinous rice flour with pandan juice and knead lightly.
2. Pinch a small piece of the dough (about 40 g) and drop it into boiling water. When the dough rises up the surface, remove it with a slotted spoon and shake off the excess water.
3. Mix the poached dough back into the main dough and knead well to form smooth dough.
Note: Don't over-knead the dough as it gets sticky the longer you touch it. As soon as there is a smooth dough, you can stop kneading it. The best is to use a ladle to mix it so that it doesn't stick to your hands. The final dough should be very soft and slightly sticky.
4. Cover the dough and set aside for about 15 minutes.  

Grated coconut:
1. Mix the grated coconut with a pinch of salt.
2. Steam the grated coconut for about 3-4 minutes.
3. Leave to cool completely.

Poach the dough filled with gula melaka:
1. Bring a pot of water to boil (use the same pot of water you used to poach the small piece of dough as mentioned above).
2. Pinch a marble-sized portion of dough (about 15 g each) and flatten lightly.
3. Fill the center of the dough with gula melaka (palm sugar) and roll them in your palm to form a smooth ball and cook the glutinuous rice balls in boiling water.
Note: the longer you hold the dough, you will notice that it will start melting and the dough will basically stick to your hands and it becomes difficult to form a smooth ball after that. The best way is to quickly roll the ball and drop it into the boiling water. Ensure that all seams are tightly sealed to prevent the dough from breaking apart in the water.
4. When the rice balls float to the surface, remove them with a slotted spoon and shake off excess water.
5. Leave to cool.

Final step:
Coat the glutinous balls with grated coconut and serve immediately.


Friday, October 23, 2009

Red Bean Soup


Ingredients:
1 cup red beans
Gula Melaka
(palm sugar) to taste
Low fat milk
Evaporated milk

I slow-cooked the red beans in a multipurpose cooker for about 2 1/2 hours until the red bean is soft (for fast cooking, you can soak the red beans overnight). I love to have it pipping hot - a simple comfort dessert on a cold-rainy day.

Tuesday, September 15, 2009

Moist Coconut Candy Recipe

(Pictures taken from my camera phone - which explains the quality)

The recipe as follows:

Ingredients:
1 whole coconut (grated)
3/4 can of 400 gm evaporated milk
1/4 cup condensed milk
1/4 cup (or less) sugar (I've reduced the sugar quantity - this is the less-sweet-version)
1 tbsp butter/ghee
1 tbsp vanilla essence
A few drops of red/green coloring ( I used green because that's Sharon's favorite color :))

Steps:
1. Pour in the evaporated milk in a non-stick pan. Add in the condensed milk and sugar and stir continuously over low heat until sugar dissolves. Stir until the mixture bubbles.
2. Add 1 tbsp butter/ghee to the mixture and keep stirring.
3. Add the vanilla essence and the coloring.
4. Continue stirring until the mixture thickens.
5. Then add the grated coconut.
6. At this point, continue stirring as to prevent the mixture from burning.
7. Keep stirring until the mixture thickens and forms a soft ball (if you want the candy to be more solid, you can continue stirring until all the moisture evaporates - as for me, I prefer the moist).
8. Press into a greased tray. Level the surface using a plastic sheet or banana leave. Leave to set and cool.
9. Store in an airtight container and refrigerate.
10. Indulge!

Sunday, September 13, 2009

Durian Butter Cake

It has been a long time since I last baked a cake - I miss that so much! As a treat for myself for being a good girl and finishing the research paper correction, I baked a cake last night - boy, it is so rewarding to smell a freshly baked cake out from the oven and the joy on my family member's face devouring the cake.

I've always wanted to bake a durian cake - and last night I went to search for durian in Tesco - it is almost the end of the durian season now, so you don't see that many vendors selling this fruit by the roadside. Durian has always been my favorite fruit despite it's bad rapport among the foreigners - it is labelled as the most disgusting fruit ever! It is an acquired taste - just like the blue cheese :)

Herewith is the recipe for Durian Butter Cake:

Ingredients:

250 gm butter
200 gm sugar (I have reduced the amount of sugar because the durian itself is sweet)
5 eggs
120 gm Durian flesh
60 ml milk
40 gm cake flour
180 gm cake flour
50 gm custard powder
1/2 tsp baking powder
1/4 tsp bicarbonate of soda
1/4 tsp salt

Method:

1. Blend/beat the durian flesh with milk and mix in the 40 gm of flour. Set aside.
2. Sieve flour with custard powder, baking powder, bicarbonate of soda and salt.
3. Cream butter and sugar till light and fluffy.
4. Add in eggs one at a time till well combined before the next addition.
5. Add in the durian and milk mixture (from step 1) and mix well.
6. Fold in the dry mixture (from step 2) and mix till well blended.
7. Check the consistency of the batter - if it's too runny, add a little bit more flour. Don't add too much flour though - the batter shouldn't be too dense - it should be a little runny - that makes the cake moist and soft.
8. Pour into the baking pan and bake in a preheated oven at 175 degrees Celcius for about 50 minutes, or until the top of the cake turns golden brown.
9. Check for doneness by inserting a skewer into the centre of the cake.
10. Savor it!

Friday, April 24, 2009

Potluck Party

I always look forward to potluck parties - the food spread, the excellent company, and the sharing - just too good to resist. No matter what I am doing, I just set everything aside for potluck parties, haha - chronic right? Once, I was just after the dentist, with the entire one side of my face numb from the anaesthetic - and I rushed back to office to make it on time for the potluck party. And I remembered having trouble smiling and eating - but what the heck - I still enjoyed myself.
This time our famous baker, Poh Wing was not around - so it wasn't as much fun without him and his cakes, hehe. Nevertheless, we had awesome spread of food - homemade macaroni & cheese, English trifle, layer cake, tarts, vegetarian mee hoon, potato salad, cheesecake (my small cute cheesecake - sliced in 20 small slices - I need to get a bigger oven!), ayamas, pizza, fruits, glutionous rice and nuggets.

My late-night baking endeavour - blueberry cheesecake

Thursday, March 26, 2009

Chocolate Cheesecake

Baked a chocolate cheesecake – from Nigella’s cookbook – I modified it a little - turned out great – with its luscious-smooth-melt-in-the-mouth texture. Drizzled some chocolate ganache on it – merely for presentation. I’ve always loved baking with cream cheese – but sometimes I run out of ideas on what to bake with cream cheese. My next venture is on tiramisu – coming soon :)

Herewith is the recipe:

Ingredients:
Cheesecake base:
125 gm cream crackers
60 gm butter
2 tbsp sugar
1 tbsp cocoa
Cheesecake filling:
175 dark chocolate, chopped small
500 gm Philadelphia cream cheese
150 gm castor sugar
1 tbsp custard powder
3 large eggs
3 large egg yolks
150 ml sour cream
1/2 tsp cocoa, dissolved in 1 tbsp hot water
Glaze (optional):
75 gm dark chocolate, finely chopped
1 tsp golden syrup
Steps:
1. To make the cheesecake base, process the biscuits to make rough crumbs and then add the butter, sugar, and cocoa.
2. Mix with your hand until it makes damp, clumping crumbs and then press the biscuit crumbs into the bottom of the cake pan to make an even base and put into the freezer while you make the filling.
3. Preheat the oven to gas mark 180ºC. Put a kettle on to boil. Melt the chocolate, and set aside to cool slightly.
4. Beat the cream cheese to soften it (you should leave the cream cheese at room temperature before beating it - to prevent lumpiness in the cake), and then add the sugar and custard powder, beating again to combine. Beat in the whole eggs and then the yolks, and the sour cream. Finally add the cocoa dissolved in hot water and the melted chocolate, and mix to a smooth batter.
5. Take the cake pan out of the freezer. Pour in the cheesecake filling.
6. Sit the cake pan in a larger pan. Fill the larger pan with hot water to come about halfway up the cake tin, and bake in the oven for 45 minutes to an hour. The top of the cheesecake should be set, but the underneath should still have a wobble to it.
7. Let the cheesecake to cool. Put in the fridge once it’s no longer hot, and leave to set, covered with clingfilm, overnight.
8. To make the chocolate glaze, very gently melt the chopped chocolate and golden syrup. When the chocolate has nearly melted, take off the heat and whisk it to a smooth sauce. Let it cool a little, and then sprinkle it over the chocolate cheesecake on its serving plate.
9. Indulge in its sinful smooth texture.

Sunday, March 15, 2009

Corn Muffin

On Thursday, I made delicious-luscious corn muffin - it has been a long time since I was craving for Kenny-Rogers muffin - and I searched for the recipe online - and most of the recipes suggested using cornmeal for the muffin. I practically combed through all the supermarkets in Malacca, but couldn't find cornmeal - Alfred had to get it from one of the supermarkets in Ampang.

The muffin turned out to be almost a cloned version of the Kenny Rogers muffin. It has a great fluffy moist texture and the texture of the muffin is denser compared to the earlier versions I made (Strawberry muffins topped with crunchy streusel and Oatmeal-apple-raisin muffins) because of the cornmeal. Herewith the recipe (makes about 12 muffins):

Ingredients:
- 1/2 cup butter
- 2/3 cup sugar (I reduced the sugar to 1/3 cup)
- 1/4 cup honey
- 2 eggs
- 1/2 tsp salt
- 1 1/2 cups all-purpose flour
- 3/4 cup yellow cornmeal
- 1/2 tsp baking powder
- 1/2 cup milk
- 3/4 cup frozen yellow corn

Steps:
1. Preheat oven to 204 degrees Celcius.
2. Cream together butter, sugar, honey, eggs, and salt in a large bowl.
3. Add flour, cornmeal, and baking powder and mix thoroughly. Add milk while mixing.
4. Add corn to mixture and combine by hand until corn is worked in.
5. Grease muffin pan and fill each cup (till full) with batter.
6. Bake for 20-25 minutes or until muffins begin to turn golden brown on top.
7. Indulge!
I think the next time I will just skip the corn, and instead stick to vanilla muffin, yum!

Tuesday, February 24, 2009

Strawberry Ice Cream

Last Sunday I was craving for something sweet and after opening and closing the fridge for a dozen times, the sight of a packet of strawberries sitting in the corner of the freezer caught my eyes - and the first thing that came to my mind - ICE CREAM! I didn't have any recipes for ice cream and decided to just 'experiment' with it. So, with 500 gm of strawberries, sugar and fresh milk, and an overnight of freezing, this is the end result - YUMMY!


Sunday, February 8, 2009

Eggless Orange Cake

A few weeks back, I made this cake for a prayer ceremony - thus, the eggless cake. Despite the incomplete recipe (which my mom wrote down from I-don't-know-which-source), we managed to 'save' the cake with some modifications. And it turned out well - soft, buttery, and smooth.
Herewith is the recipe:

Ingredients:
- 150 ml Marigold orange juice
- Grated rind of 1 orange
- 2 tsp orange essence
- 300 gm self-raising flour
- 1 tsp baking powder
- 1/2 tsp bicarbonate of soda
- 300 gm condensed milk
- 1 tbsp castor sugar
- 200 gm butter
- 1/2 tsp salt

Steps:
1) Preheat oven to 170 degrees Celcius.
2) Juice mixture - combine the orange juice, orange rind, and orange essence in a bowl.
3) Combine the condensed milk, castor sugar, melted butter and salt in a bowl.
4) Add the two liquid mixture (in steps 1 and 2) and mix together.
5) Sift together the flour, baking powder, and bicarbonate of soda.
6) Slowly add the sifted dry ingredients (in step 5) into the liquid mixture (in step 4) and stir as you add them.
7) Bake in a preheated oven for 40 to 45 minutes or until done when tested with a wooden skewer.

Wednesday, December 31, 2008

Butter Crunch Cookies


Crunchy, chewy and buttery - the butter crunch cookies. The texture of the cookie turned out fine, but I think I added a little too much of salt, so in this recipe I am omitting salt (that is, if you are using salted butter for this recipe).

Herewith is the recipe:
Ingredients:
- 1 cup butter, softened
- 1 cup sugar
- 1 1/2 cups all-purpose flour
- 1 tsp cream of tartar
- 1 tsp baking soda
- 2 cups lightly crushed cornflakes
- 1/2 cup cereals with pumpkin seeds and raisins

Steps:
1. In a large mixing bowl, cream the butter and sugar until light and fluffy.
2. In a separate bowl, combine flour, cream of tartar, and baking soda and whisk to combine.
3. Gradually add in the dry ingredients to the butter and sugar mixture.
4. Stir in cornflakes and the cereals. Mixture will be thick and almost dough-like.
5. Preheat oven to 175 degrees Celcius.
6. Roll the mixture into balls and place 1 inch apart on a greased baking sheet/tray.
7. Bake for 10 - 12 minutes or until lightly browned.
8. Enjoy the crunchiness after letting it to cool for a while. Crunch crunch...

Monday, December 29, 2008

Steamed Moist Chocolate Cake

On Christmas Eve, I baked 2 cakes; cheesecake for Alfred and the other one is steamed moist chocolate cake. This is the second time I am making steamed chocolate cake. The first time, I used a ready-made chocolate flour for the cake. This time, the recipe includes making the batter for the cake. I layered the cake and sandwiched it with creamy milk chocolate with hazelnut. When you bite into the cake, the creamy layer just melts in your mouth - and I love the crunchiness of the hazelnut. I myself (am not a chocolate cake fan) got hooked to the cake ;)
Herewith is the recipe:
Ingredients:
A
1 cup evaporated milk
1 cup sugar
1 cup good quality cocoa powder
250 gm unsalted butter
3/4 tsp instant coffee powder
B
3 large eggs (lightly beaten)
1/2 cup condensed milk
1 tsp vanilla essence
C
1 and a 1/4 cup plain flour
1 tsp baking soda
1 tsp baking powder
Steps:
1. Mix ingredients in A together and cook over low fire until sugar is completely melted. Stir constantly to prevent it from burning. Set aside to cool.
2. Mix A and B together until well-blended.
3. Sift C together and add into the mixed liquid mixture. Mix well until there are no lumps of flour to be seen.
4. Pour into a greased and lined round pan and steam over high heat for 45 minutes to an hour. Check for doneness by inserting a skewer into the centre of the cake.
5. Cool in pan for 5 minutes. Remove from pan carefully and let cool completely on rack.
6. Layer the cake into 2. Spread melted milk chocolate with hazelnut and sandwich the 2 cakes together.
7. The cake tastes better if it is stored outside at room temperature - you get to enjoy the melting milk chocolate texture in-between the cake when you bite into it. Yummy!

Wednesday, December 24, 2008

The Christmas Eve Feast

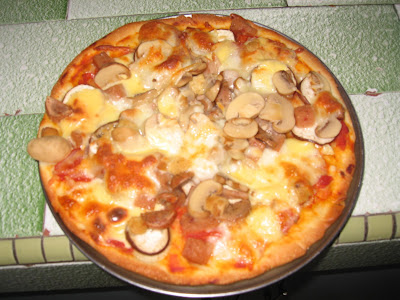
Cooking, baking, and feasting - with great company - that was what we did on Christmas Eve. I made few dishes - and am glad it was wiped out in no time, hehe. I made Spagetti with creamy alfredo sauce, deep-dish pizza, pizza bombs, and thin-crust pizzas. It was a fun get-together.

Thin-crust pizza (I made two pizzas - one vegetarian and the other one with some sausages and luncheon meat as toppings)

Pizza Bombs (pizza dough stuffed with mozarella cheese, chunks of sausages, and minced meat)

Spagetti with Creamy Alfredo Sauce

Deep-dish pizza - with lots of chewy-stringy-gooey mozarella cheese

My sisters and cousin savouring the pizzas

My celebrity uncle - who simply loves to take photos ;)

A picture to keep ;)

Sunday, December 21, 2008

Potluck Baking - Cheesecake with Apricot Glaze

Last Friday, we organized a potluck party among our colleagues - and it has always been something that I look forward to very much - the feasting, the mingling, the celebration :) This time we had gift exchange for Xmas, it was fun. I got a I baked a cheesecake with apricot glaze - the same cheesecake recipe which I posted some time back, except this time I substituted the glaze to apricot jam. Since cheesecake have always been everyone's favorite, it was no surprise that it 'sold' out like hot-cake, hehe. Now you see, now you don't! Will post the pictures of our potluck party soon.